
In this blog we will learn how to create a CRUD Operation in JavaScript. The processes are Create, Read, Update, and Delete. With these processes, we can create, take input, manipulate & destroy the objects.
We are not going to use any framework of JavaScript. We are use JavaScript, HTML, CSS and Bootstrap to design CRUD Operation in JavaScript.
👉🏻 Front-end Developer Roadmap : Frontend Developer Roadmap 2024
Let’s develop step by step CRUD application using HTML, CSS, Bootstrap and JavaScript. We are going to build Employee Management Application using performing crud operations
Table of Contents
Step 1: Creating HTML Page
Let’s create an HTML file and named index.html and add following content.
<!DOCTYPE html>
<html lang="en">
<head>
<meta charset="UTF-8" />
<title>CRUD Application</title>
<!-- Adding Bootstrap -->
<link
href="https://maxcdn.bootstrapcdn.com/bootstrap/5.1.3/css/bootstrap.min.css"
rel="stylesheet"
/>
<!-- CSS file link -->
<link rel="stylesheet" href="style.css" />
</head>
<body>
<div class="container">
<h1>CRUD Application</h1>
<form id="employeeForm">
<div class="mb-3">
<label for="fullName" class="form-label">Full Name</label>
<input type="text" class="form-control" id="fullName" required />
</div>
<div class="mb-3">
<label for="email" class="form-label">Email</label>
<input type="email" class="form-control" id="email" />
</div>
<div class="mb-3">
<label for="salary" class="form-label">Salary</label>
<input type="text" class="form-control" id="salary" />
</div>
<div class="mb-3">
<label for="city" class="form-label">City</label>
<input type="text" class="form-control" id="city" />
</div>
<button type="submit" class="btn btn-primary">Add Employee</button>
</form>
<hr />
<h2>Employee List</h2>
<table id="employeeTable" class="table">
<thead>
<tr>
<th>Full Name</th>
<th>Email</th>
<th>Salary</th>
<th>City</th>
<th>Action</th>
</tr>
</thead>
<tbody id="employeeData">
<!-- Employee data will be displayed here -->
</tbody>
</table>
</div>
<!-- link js file -->
<script src="script.js"></script>
</body>
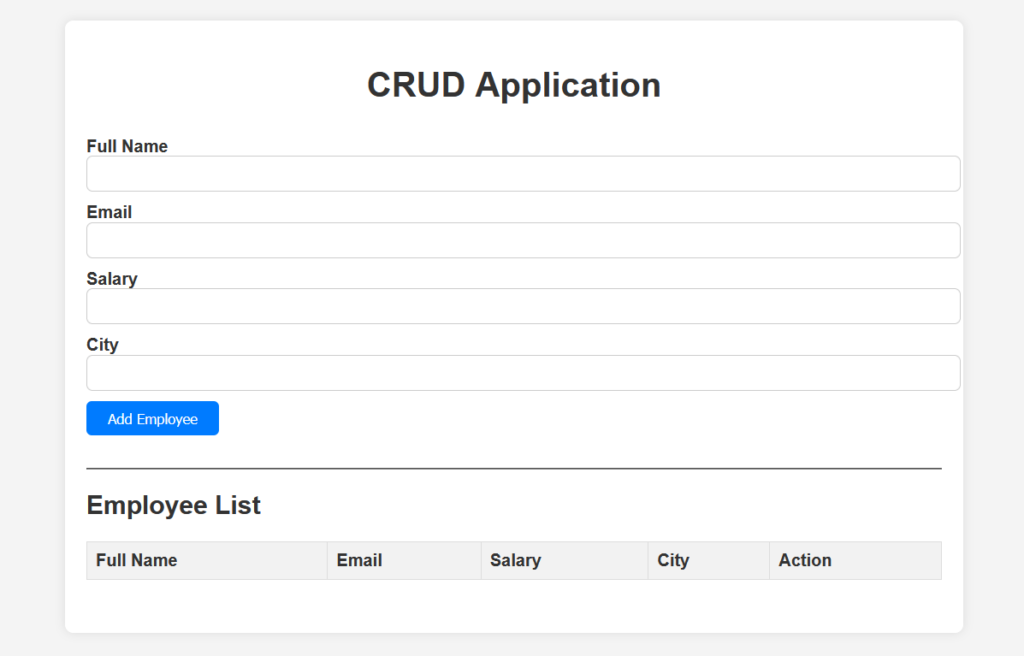
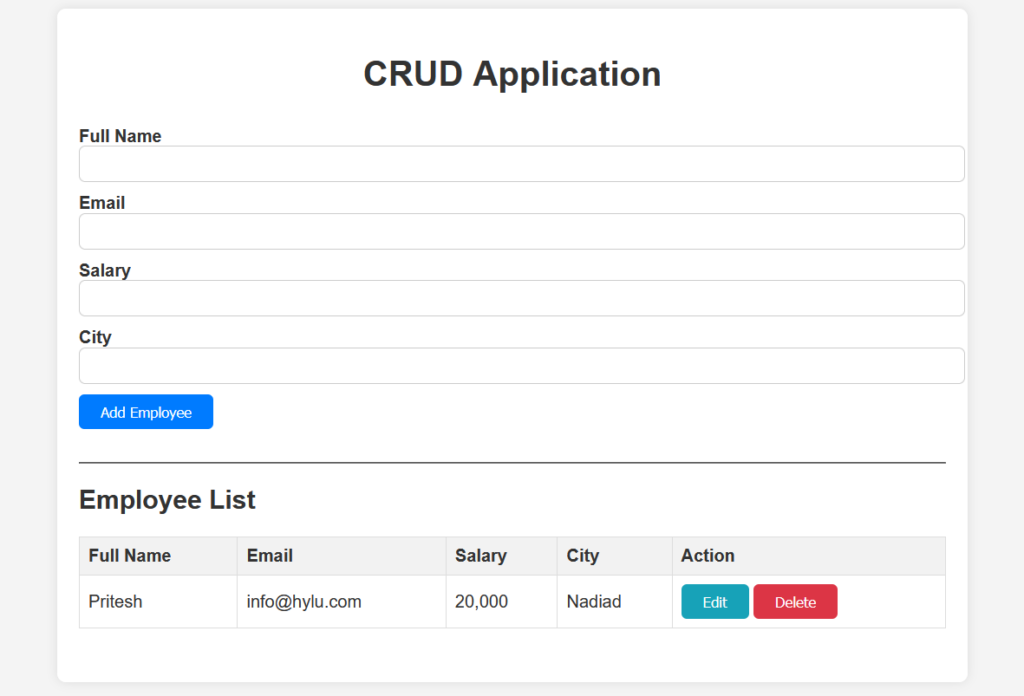
</html>Note that we have created an Employee form. Using this form we can add a new employees to the list. We have also created an HTML table to display newly created employees.
We have assigned a unique id to each input elements fullName, email, salary, and city in HTML form:
<input type="text" class="form-control" id="fullName" required />
<input type="email" class="form-control" id="email" />
<input type="text" class="form-control" id="salary" />
<input type="text" class="form-control" id="city" />
Step 2. CRUD operations in JavaScript
Let’s understand the above JavaScript code.
// Array to store employee data (simulating a database)
let employees = [];

// Function to display employee data in the table
function displayEmployees() {
    const employeeTable = document.getElementById('employeeData');
    employeeTable.innerHTML = '';

    employees.forEach((employee, index) => {
        const row = employeeTable.insertRow();
        row.innerHTML = `
            <td>${employee.fullName}</td>
            <td>${employee.email}</td>
            <td>${employee.salary}</td>
            <td>${employee.city}</td>
            <td>
                <button class="btn btn-sm btn-info" onclick="editEmployee(${index})">Edit</button>
                <button class="btn btn-sm btn-danger" onclick="deleteEmployee(${index})">Delete</button>
            </td>
        `;
    });
}

// Function to add a new employee
document.getElementById('employeeForm').addEventListener('submit', function (e) {
    e.preventDefault();

    const fullName = document.getElementById('fullName').value;
    const email = document.getElementById('email').value;
    const salary = document.getElementById('salary').value;
    const city = document.getElementById('city').value;

    const employee = {
        fullName,
        email,
        salary,
        city
    };

    employees.push(employee);
    displayEmployees();
    document.getElementById('employeeForm').reset();
});

// Function to edit an existing employee
function editEmployee(index) {
    const employee = employees[index];
    document.getElementById('fullName').value = employee.fullName;
    document.getElementById('email').value = employee.email;
    document.getElementById('salary').value = employee.salary;
    document.getElementById('city').value = employee.city;

    employees.splice(index, 1);
    displayEmployees();
}

// Function to delete an employee
function deleteEmployee(index) {
    employees.splice(index, 1);
    displayEmployees();
}
Let’s understand the above JavaScript code.
Initialization :
We have created an empty array employees is initialized to store employee data.
let employees = [];
Display Functions:
- The
displayEmployeesfunction populates the table with employee data stored in theemployeesarray. - For each employee, a new row is created in the table with columns displaying their full name, email, salary, city, and buttons to edit or delete.
function displayEmployees() {
    const employeeTable = document.getElementById('employeeData');
    employeeTable.innerHTML = '';

    employees.forEach((employee, index) => {
        const row = employeeTable.insertRow();
        // Creating a new row in the table for each employee
        row.innerHTML = `
            <td>${employee.fullName}</td>
            <td>${employee.email}</td>
            <td>${employee.salary}</td>
            <td>${employee.city}</td>
            <td>
                <button class="btn btn-sm btn-info" onclick="editEmployee(${index})">Edit</button>
                <button class="btn btn-sm btn-danger" onclick="deleteEmployee(${index})">Delete</button>
            </td>
        `;
    });
}
Adding a new Employee:
- This code listens for the form submission and collects employee data from the input fields.
- It creates an object for the new employee and adds it to the
employeesarray. - Then, it calls
displayEmployeesto update the displayed employee list in the table and resets the form.
document.getElementById('employeeForm').addEventListener('submit', function (e) {
    e.preventDefault();
    // Retrieving employee data from the form
    const fullName = document.getElementById('fullName').value;
    const email = document.getElementById('email').value;
    const salary = document.getElementById('salary').value;
    const city = document.getElementById('city').value;
    // Creating an object for the new employee
    const employee = {
        fullName,
        email,
        salary,
        city
    };
    // Adding the new employee to the array and displaying the updated list
    employees.push(employee);
    displayEmployees();
    document.getElementById('employeeForm').reset(); // Clearing the form
});
Editing an Employee :
editEmployeefunction allows editing an existing employee.- It retrieves the employee’s data from the array based on the provided index, fills the form fields with this data for editing, removes the selected employee from the array, and refreshes the displayed list in the table.
function editEmployee(index) {
    const employee = employees[index];
    // Filling the form with the selected employee's data for editing
    document.getElementById('fullName').value = employee.fullName;
    document.getElementById('email').value = employee.email;
    document.getElementById('salary').value = employee.salary;
    document.getElementById('city').value = employee.city;
    // Removing the edited employee and updating the table
    employees.splice(index, 1);
    displayEmployees();
}
Deleting an Employee :
The deleteEmployee function removes an employee from the array based on the provided index and updates the displayed list in the table after deletion.
function deleteEmployee(index) {
    employees.splice(index, 1);
    displayEmployees();
}
Step 3. Styling HTML Page
Now let’s add some CSS to HTML to make the web-page stylish and looks very stunning.
Let’s create a CSS file named style.css and add the following content to it:
/* Add your custom CSS styles here */
body {
    font-family: Arial, sans-serif;
    padding-top: 20px;
    background-color: #f4f4f4;
    color: #333;
}

.container {
    max-width: 800px;
    margin: 0 auto;
       background-color: #fff;
    padding: 20px;
    border-radius: 8px;
    box-shadow: 0 0 10px rgba(0, 0, 0, 0.1);
}

h1 {
    text-align: center;
    margin-bottom: 30px;
}

/* Form styles */
form {
    margin-bottom: 30px;
}

.form-label {
    font-weight: bold;
}

.form-control {
    width: 100%;
    padding: 8px;
    margin-bottom: 10px;
    border-radius: 5px;
    border: 1px solid #ccc;
}

/* Button styles */
.btn {
    cursor: pointer;
    border-radius: 5px;
    padding: 8px 20px;
}

.btn-primary {
    background-color: #007bff;
    color: #fff;
    border: none;
}

.btn-info {
    background-color: #17a2b8;
    color: #fff;
    border: none;
}

.btn-danger {
    background-color: #dc3545;
    color: #fff;
    border: none;
}

/* Table styles */
table {
    width: 100%;
    border-collapse: collapse;
    margin-bottom: 30px;
}

th, td {
    border: 1px solid #ddd;
    padding: 8px;
    text-align: left;
}

th {
    background-color: #f2f2f2;
}

/* Responsive styles */
@media (max-width: 768px) {
    .container {
        padding: 15px;
    }
}
Run index.html in Browser
Let’s open the index.html file in your favorite browser and see the output.
Crud Operation in JavaScript Live Demo
In this section we will look single page live demo of crud operations in JavaScript using play button top-right side of code.
<!DOCTYPE html>
<html lang="en">
  <head>
    <meta charset="UTF-8" />
    <title>CRUD Application</title>
    <!-- Adding Bootstrap -->
    <link
      href="https://maxcdn.bootstrapcdn.com/bootstrap/5.1.3/css/bootstrap.min.css"
      rel="stylesheet"
    />
    <!-- CSS -->
    <style>
      /* Add your custom CSS styles here */
      body {
        font-family: Arial, sans-serif;
        padding-top: 20px;
        background-color: #f4f4f4;
        color: #333;
      }

      .container {
        max-width: 800px;
        margin: 0 auto;
        background-color: #fff;
        padding: 20px;
        border-radius: 8px;
        box-shadow: 0 0 10px rgba(0, 0, 0, 0.1);
      }

      h1 {
        text-align: center;
        margin-bottom: 30px;
      }

      /* Form styles */
      form {
        margin-bottom: 30px;
      }

      .form-label {
        font-weight: bold;
      }

      .form-control {
        width: 100%;
        padding: 8px;
        margin-bottom: 10px;
        border-radius: 5px;
        border: 1px solid #ccc;
      }

      /* Button styles */
      .btn {
        cursor: pointer;
        border-radius: 5px;
        padding: 8px 20px;
      }

      .btn-primary {
        background-color: #007bff;
        color: #fff;
        border: none;
      }

      .btn-info {
        background-color: #17a2b8;
        color: #fff;
        border: none;
      }

      .btn-danger {
        background-color: #dc3545;
        color: #fff;
        border: none;
      }

      /* Table styles */
      table {
        width: 100%;
        border-collapse: collapse;
        margin-bottom: 30px;
      }

      th,
      td {
        border: 1px solid #ddd;
        padding: 8px;
        text-align: left;
      }

      th {
        background-color: #f2f2f2;
      }

      /* Responsive styles */
      @media (max-width: 768px) {
        .container {
          padding: 15px;
        }
      }
    </style>
  </head>
  <body>
    <div class="container">
      <h1>CRUD Application</h1>
      <form id="employeeForm">
        <div class="mb-3">
          <label for="fullName" class="form-label">Full Name</label>
          <input type="text" class="form-control" id="fullName" required />
        </div>
        <div class="mb-3">
          <label for="email" class="form-label">Email</label>
          <input type="email" class="form-control" id="email" />
        </div>
        <div class="mb-3">
          <label for="salary" class="form-label">Salary</label>
          <input type="text" class="form-control" id="salary" />
        </div>
        <div class="mb-3">
          <label for="city" class="form-label">City</label>
          <input type="text" class="form-control" id="city" />
        </div>
        <button type="submit" class="btn btn-primary">Add Employee</button>
      </form>
      <hr />
      <h2>Employee List</h2>
      <table id="employeeTable" class="table">
        <thead>
          <tr>
            <th>Full Name</th>
            <th>Email</th>
            <th>Salary</th>
            <th>City</th>
            <th>Action</th>
          </tr>
        </thead>
        <tbody id="employeeData">
          <!-- Employee data will be displayed here -->
        </tbody>
      </table>
    </div>
    <!-- link js file -->
    <script>
      // Array to store employee data (simulating a database)
      let employees = [];

      // Function to display employee data in the table
      function displayEmployees() {
        const employeeTable = document.getElementById("employeeData");
        employeeTable.innerHTML = "";

        employees.forEach((employee, index) => {
          const row = employeeTable.insertRow();
          row.innerHTML = `
            <td>${employee.fullName}</td>
            <td>${employee.email}</td>
            <td>${employee.salary}</td>
            <td>${employee.city}</td>
            <td>
                <button class="btn btn-sm btn-info" onclick="editEmployee(${index})">Edit</button>
                <button class="btn btn-sm btn-danger" onclick="deleteEmployee(${index})">Delete</button>
            </td>
        `;
        });
      }

      // Function to add a new employee
      document
        .getElementById("employeeForm")
        .addEventListener("submit", function (e) {
          e.preventDefault();

          const fullName = document.getElementById("fullName").value;
          const email = document.getElementById("email").value;
          const salary = document.getElementById("salary").value;
          const city = document.getElementById("city").value;

          const employee = {
            fullName,
            email,
            salary,
            city,
          };

          employees.push(employee);
          displayEmployees();
          document.getElementById("employeeForm").reset();
        });

      // Function to edit an existing employee
      function editEmployee(index) {
        const employee = employees[index];
        document.getElementById("fullName").value = employee.fullName;
        document.getElementById("email").value = employee.email;
        document.getElementById("salary").value = employee.salary;
        document.getElementById("city").value = employee.city;

        employees.splice(index, 1);
        displayEmployees();
      }

      // Function to delete an employee
      function deleteEmployee(index) {
        employees.splice(index, 1);
        displayEmployees();
      }
    </script>
  </body>
</html>
Whether you’re preparing for your first job interview or planning to up-skill in this tech era, Bhylu.com are your key to success of coding. We provide topnotch content for free, all geared towards boosting your growth in a time-bound manner. Join the millions we’ve already empowered, and we’re here to do the same for you.